Around Thanksgiving, I got the bug to get my craft room in shape. For a while it had been no more than a storage space after we moved in. Any furniture we didn’t want to get rid of and any special paperwork that needed to be sorted was shoved into my crafting room. Nothing was done with any of it and the piles kept rising so I slowly closed my door and forgot that the original intent of that space was to give me some creative space.
Well, I was feeling the need to sew again and I knew I wanted to make my space functional for not only when I wanted to sew but also when I had a friend or two over to sew with.
After cleaning up and getting the space ready, I knew what I wanted next: a design wall! And I had the space for it. One of my walls was completely free of doorways or windowsills and I knew with the right pieces I could pull together a rather inexpensive space to put up my blocks and quilted pieces.
Before heading to Home Depot, I did a little research and decided to follow this tutorial from SewCanShe. Seeing how easily one could be put together, I was pumped and ready to go.

And so were my guys. At Home Depot we spent around $15 for two panels of 4ft x 8ft insulation. I wasn’t looking to make a beautiful design wall, just a functioning one that did what I needed it to do.
Then I headed to Joann’s and bought some fleece on sale for 50% off. This is where I made a mistake. Most tutorials for making a design wall suggests buying fleece or flannel with the width of 108″. As I went in, armed with my 50% coupon, I headed to the wall of fleece bolts and picked a light buttery yellow fabric. My craft room is small and anything TOO dark would have made it feel cramped so I wanted to keep it light.
But in my haste to run home and get started on piecing it together, I accidentally bought the 45″ wide fabric and only cut a single 3.5 long piece. Proud of my decision and my ability to pull everything together quickly, I headed home and set to work.

Laying the boards on the ground in my living room, I lightly sprayed some 3M adhesive and wrapped the boards tightly in the soft buttery yellow fabric. Once the adhesive took hold, I went back over it and used a stapler to really hold it down. As I moved down the first board, I started to panic a bit. If I was seeing things correctly, I would run out of fabric once I wrapped the first board and trimmed the excess off. OH DAMN!

Yeah, I had bought the wrong width of fabric which meant, even with my coupon and the sales at Joann’s, I had to purchase my fabric TWICE. In the end I was spending twice as much as I needed to had I bought to correct sized fabric in the first place. BLAH!
After finishing the first panel, we nailed it into the wall. The height of of the panel is 8ft which fit perfectly and gave me a completely covered wall from ceiling to floor. We don’t have any molding at the top but we did have some baseboards to work around. Instead of cutting the insulation boards, we just affixed them above the baseboards and left them intact. There is a bit of lift along the baseboards but you don’t really notice that at all.
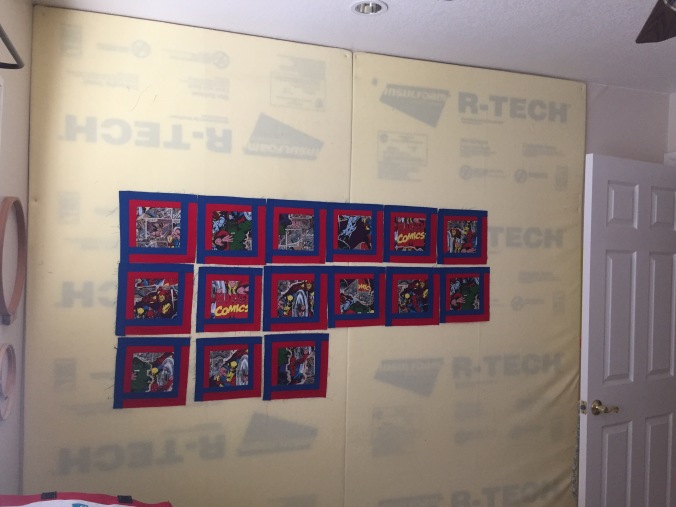
After my second trip to Joann’s, I wrapped the last panel and then attached it to the wall in the same manner. I noticed once I had them up and side-by-side that I didn’t pull the fabric as taut on the second panel which bugs me but not enough to pull them down and fix it. And had I gone darker with the fabric, it would have nicely covered the decals on the panels, another thing that bugs me but not enough to take them down and fix the problem.

In the end, all the little bugs and pet peeves don’t matter much because I know have a completely covered wall that allows me to put up my WIPs and UFOs. No longer will projects languish in my drawers, out of sight and out of mind.
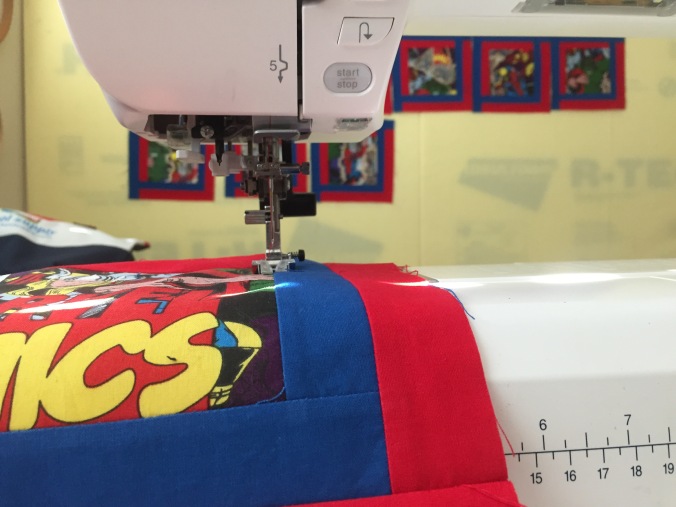
While I sew, I can see it looking back at me, reminding me to keep working. It allows me to play with my colors and fabrics, placing them and then removing them based on my needs and my creative whims.
And being such a visual personal, this is a great tool that will help me see my projects before I sit down to make them.
Like us on Facebook: Hobbies Up To Here
Subscribe to us on iTunes: Hobbies Up To Here
Check out our YouTube channel: Katie V. with Hobbies Up To Here
Tune in for some Periscope fun: Katie V.
And follow us on BlogLovin: Hobbies Up To Here
Pop by on Instagram: Hobbies Up To Here


 The
The