Kitting Up!

Have you ever excitedly grabbed a new cross stitch chart, then quickly pulled out your (or so you thought!) extensive stash of fabric, floss and needles only to find that you were missing key elements that you needed to start your project right at that moment?

Argh!  Join the club!

Because I’ve had this happen one too many times, I’ve committed to kitting up my projects ahead of time.  What’s “kitting” you ask?  Wellll lemme tell you!  It works!  It’s saved me many a tear and tantrum lol!

Here’s how I go about kitting a project:  As soon as I get a new chart, I go to the aforementioned stash, and start shopping.  Hopefully, I have stitching fabric that will work well, and one that I enjoy stitching on, that also is a color compliment to the chart design.  What’s the point of buying fabric if I don’t use it, right?  Next, I grab my DMC floss, and begin to search for the chart’s list of colors, checking them off one by one.  Then (and here’s my favorite part!) I go to my hand and over dyed floss, and see of I can substitute them for any DMC I’m missing, or switch out the DMC I’ve pulled for more custom dyed colors.  I’ve also taken the time to print out conversion charts from Stitches ‘n Things for Weeks Dye Works, Classic Colorworks Threads and Gentle Art Sampler Threads to make things easier for me.

img_8120

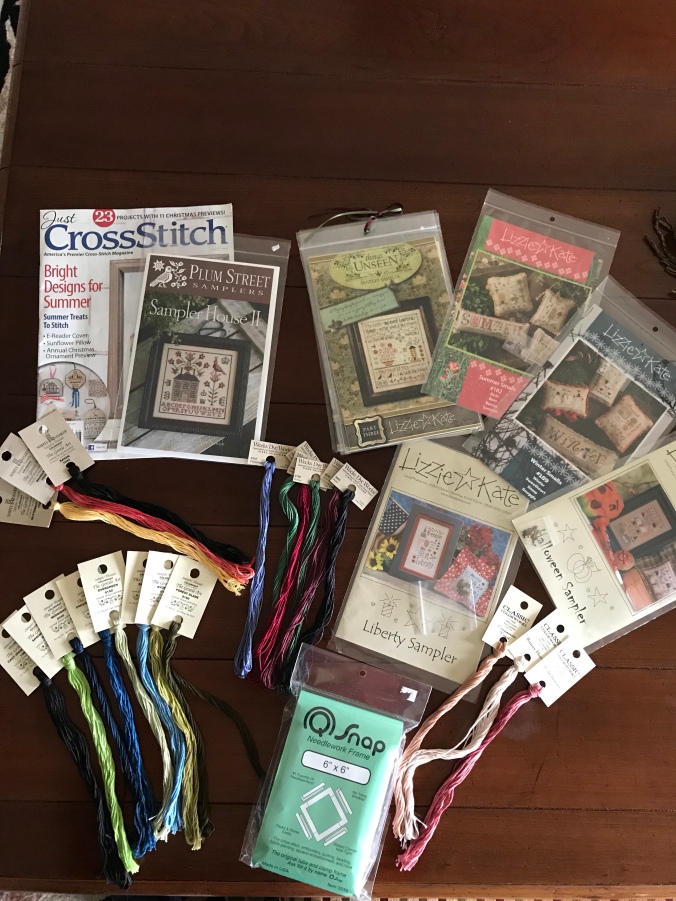
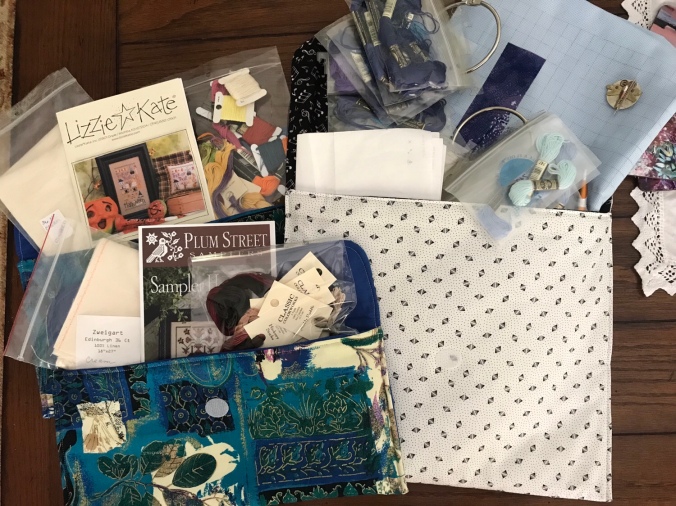
New haul! Now to start organizing and kitting them up!

img_8175

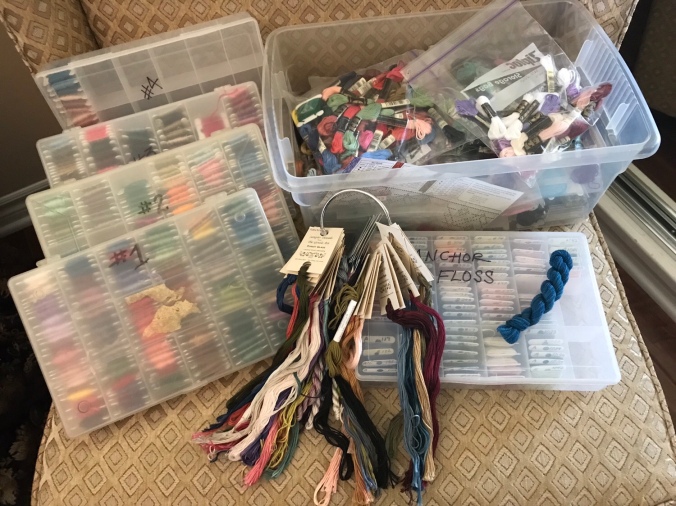
Shopping for floss in my stash! Some of these skeins are over thirty years old lol!

img_8176

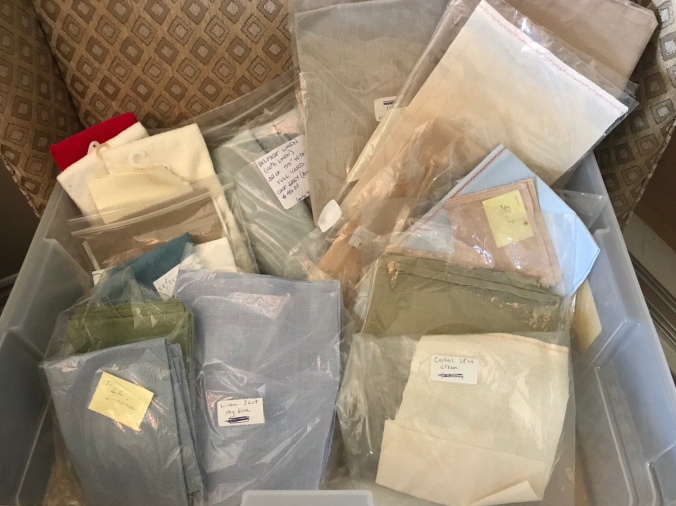
Ahhhhhhh all the gorgeousmus stitching fabric options in my “collection”!

img_8174

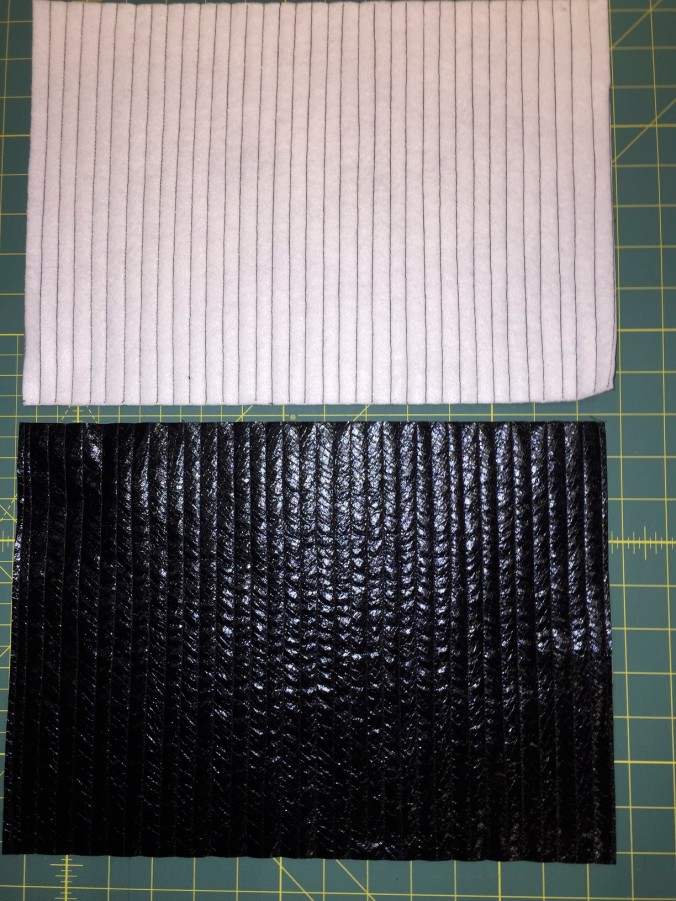
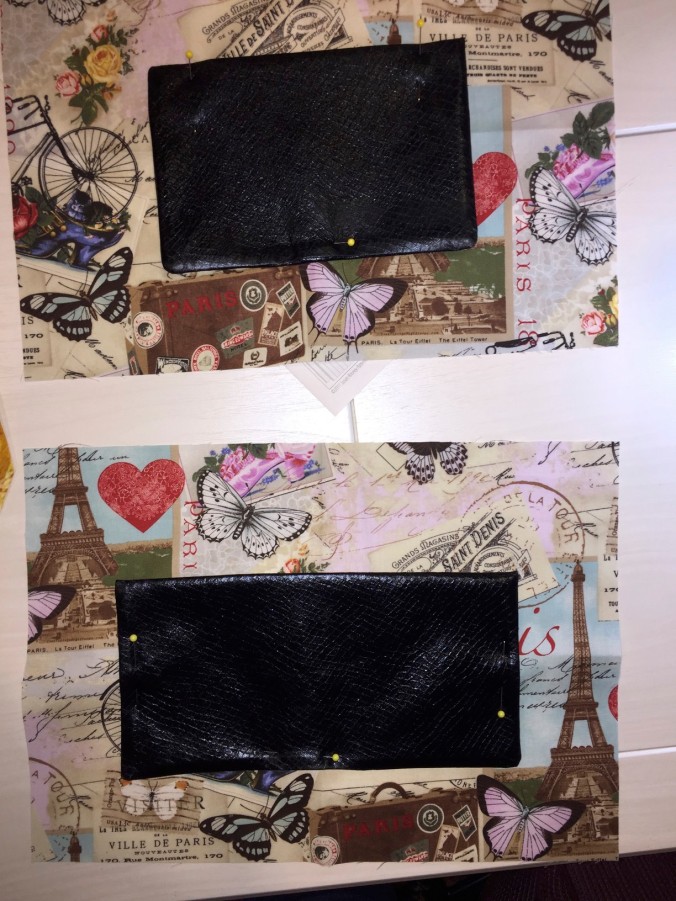
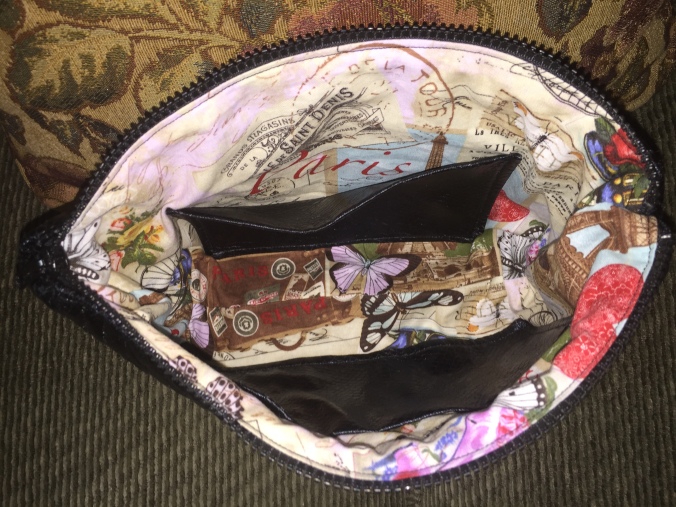
I made some project envelopes after following instructions from Vonna Pfeifer’s YouYube tutorial. Everything is present and accounted for, and in a safe place! I can start stitching on any one of these projects any time I want. 🙂

When I’m done with that part of the process, I make a list of anything I’m missing.  Whether I shop online, or run to Joanne for DMC or my local needlework shop We, Of The Needle for speciality items, it’s my goal to have EVERYTHING in place and in a project envelope for when I can sit down and stitch.  No more frustration!

I hope this helps!

Happy Stitching!

Dori 🙂

Like us on Facebook: Hobbies Up To Here

Subscribe to us on iTunes: Hobbies Up To Here

Check out our YouTube channel: Katie V. with Hobbies Up To Here

And follow us on BlogLovin: Hobbies Up To Here

Pop by on Instagram: Hobbies Up To Here

Adventures In 3D Sewing: The Paris Purse

There are soooo many wonderful bag and purse patterns available today. While at the Orange Quilt Bee a couple of years ago, I saw one I just had to have, and instantly had someone in mind to gift it to.

My daughter Jennifer’s birthday was coming up, and I didn’t want to give her the normal card with a check as a gift. This Susan Rooney Patterns Versatile Wave Interchangeable Purse by Ruthann Stilwell pattern was perfect!


I also wanted to look for fabric that was reflective of her, and if I could, something that would bring to mind a memory that she and I shared exclusively. She and I spent two weeks in Paris a few years ago, so that’s where my mind went. Now to find a fabric that reflected that!

Luckily, I had no problem in that regard. What I really liked about this pattern, was that it was actually two bags in one; a quilted faux leather clutch alone, or add the reversible outer shell, and it became a shoulder bag.

I did a simple straight line quilting pattern on the faux leather.  Easy peasy!

IMG_5742

I added pockets to the lining of the purse with the faux leather.  I looove that print fabric!

IMG_5741

This is a view of the finished “clutch” part of the purse.  I could have stopped there, but nope! Onto the outer, reversible shell!

IMG_5743

Here’s the finished purse. I love the scalloped edge! The button helps to attach the shell, and adds interest.  The straps are detachable, so the clutch can be used independently.
IMG_5746

This final photograph shows all three views;  the clutch, the reversible shell with the neutral fabric showing, and then that lovely Paris fabric!  And yes, that’s a photo of Jennifer and me when she was itsybitsy!
IMG_5759

This was a fun project to make. It had been a long time since I’d inserted a zipper;  sewing with faux leather was a new experience, as well as adding the hardware;  I’m glad I tackled it. Jennifer was tickled with her custom birthday gift! Yay!

Enjoy your crafty day!

Hugs,
Dori

TGIFF: The Beatles Quilt

Each time I’ve completed a quilt, I go through a myriad of feelings.  Joy, excitement, sadness and accomplishment.  All this and soooo much more filled my heart when I put the last stitch in the binding of The Beatles Quilt, a.k.a. “Blackbird”.

It’s taken two years to complete, and it’s been worth every single second!  I wrote about it’s progress in WIP Wednesday: The “Revolution” Beatles Quilt, and Katie and I talked about it on our podcast called Blackbird Quilt Episode #81.   As you might have guessed, this quilt has gone through a few name changes, and though he has settled on “Blackbird”, I’m not writing that title in cement lol!

Though Reg had wanted to hand quilt this piece on his own, he decided to turn it over to the very creative and capable hands of our longarmer, Karen Kimmel of Long Beach, CA. She did an amazing job, and worked hard to translate Reg’s vision into reality. To say she succeeded in spades, is an understatement!  (The video below is Reg’s reaction after getting his quilt back from Karen!)

It still boggles my mind to think that my hubby started with his coveted White Album inspired guitar strap, and ended up with an original, one-of-a-kind quilt!

IMG_8477

He started with these images…

img_7839

…and ended up with THIS!

I’m looking forward to partnering with my husband again on yet another musically inspired quilt. Maybe the Foo Fighters? Jimi Hendricks? How about The Who?!? These and so many more names have been discussed in the past couple of months as “Blackbird” was getting closer to being finished.

I can’t wait!

Hugs,

Dori

Like us on Facebook: Hobbies Up To Here

Subscribe to us on iTunes: Hobbies Up To Here

Check out our YouTube channel: Katie V. with Hobbies Up To Here

Tune in for some Periscope fun: Katie V.

And follow us on BlogLovin: Hobbies Up To Here

Pop by on Instagram: Hobbies Up To Here


Frankie Baby!

To say that my husband is proud of his very first fully completed quilting project is an understatement!  From start to finish, he did everything…choosing the pattern, the fabrics, the hand embroidery, the appliqué process, the quilting, the binding and sewing on the buttons.  ALL OF IT!  And I’m sure you’ll agree it’s not only adorable but it’s also fabulously executed!

This is the pattern that Reg chose.  Isn’t that button pack cute!?

img_7361

Using the light box he made for me, Reg traced all the appliqué shapes carefully on Wonder-Under, which I had on hand.  There were soooo many pieces lol!  Then he fused the pieces to well chosen fabrics that he felt Frank would be stylin’ in.

img_7360

Choosing a light green fabric for Frank’s skin tone, was a no-brainer.  Reg insisted Frank’s pallor was important!

img_7363

Here’s where Reg’s vision really came into play.  He wasn’t satisfied with the pattern’s suggestion for a background.  So, while on the So. Cal. Quilters Run, we kept a look out for some sort of Halloween fabric that would suffice.  We found a beautiful panel that made all the difference, and helped Frank to look like he was almost three dimensional.

img_7368

Though Reg has needlepoint experience, he’d never done embroidery before.  He chose to do a simple backstitch with black embroidery thread.  He even learned how to bury threads between the layers!

img_7371

Reg has always been a bit wary of my sewing machine.  But, determined to do this all on his own, he allowed me to teach him how to use a buttonhole stitch to anchor the raw edged appliqué pieces.  He first tweaked the stitch a bit to his liking, then setting the speed to low, patiently stitched every curve and difficult point.  Then he switched gears and quilted around the tree branches and the haunted house.

IMG_1173

He’s definitely a “go big or go home” kinda guy.  When stitching the handle on Frank’s treat bag, he chose this bright silk ribbon.  Now…have you noticed something different about this and the last photo?  The fussy cut spider treat bag is different, yes?  Welllll….that’s because Reg wasn’t happy with the first go at Frank.  So he made a completely NEW one!  There were a couple of things that he did differently, but he’s much happier with how the second wallhanging came out.

img_7447

Ta Da!  And here he is, all ready to go trick-or-treating!

That FACE!!!

The bag is perfect!

img_7449
I’m not a natural teacher.  Trying to translate skills that I’ve practiced for more than forty-five years was daunting for me.  I take them for granted, and with Reg being a complete beginner, I needed to remember to include the absolute basics.  He patiently listened and learned quickly.  At times, he even questioned my methods! Being quite open minded and the type who thinks outside the box, he often implemented his own ideas on how he wanted to proceed.  Trust me, I had to let go of my pride and ego to allow him to experiment and do his own thing!

Are you gearing up for the Halloween season?  How so?  Do you create and add to your collection every year?

We’d love to hear!

Dori

Like us on Facebook: Hobbies Up To Here

Subscribe to us on iTunes: Hobbies Up To Here

Check out our YouTube channel: Katie V. with Hobbies Up To Here

Tune in for some Periscope fun: Katie V.

And follow us on BlogLovin: Hobbies Up To Here

Pop by on Instagram: Hobbies Up To Here

I’m In Heaven!

Or should I say Heaven and Earth?  That’s the name of the design company from which I bought my most recent cross stitch chart and spoke so passionately about in episode #71.  Talk about instantaneous gratification too!  I paid for the chart with my PayPal account, then downloaded the PDF file to my GoodReader app on my iPad.  Because this chart is an all-over design, it’s presented in “pages”.  As I stitch each ten-stitch by ten-stitch grid on the page, I have the ability to highlight each stitch completed in a chosen color, and with another color, I can highlight where I’ve “parked” my thread in the next ten-stitch by ten-stitch grid.  My favorite part is the ability to pinch my iPad screen and enlarge as much of the chart as I want.  SCORE!

Here’s an example of both the grids and how the threads are parked:

DSC04350

The photo below shows my first completed grid! I chose to use a mechanical pencil to lightly mark my grid, instead of stitching it with fine fishing line.  Most of the marks will be covered up by stitching.  The remaining lines will be carefully erased, and the rest will surely disappear with a gentle washing after the stitching is completed.

This type of cross stitching blew me away.  The designs are stunning, intense and so gratifying to stitch up.  But….I had to let go of some of my died-in-the-wool cross stitching rules.  I’ve always stitched as though the back was just as important as the front.  I wanted it to look neat.  Stitching by grid and parking my threads, meant that a neat back was impossible.  In the linked video below, Carolyn Mazzeo gives an excellent tutorial on how she parks her threads.  When she mentions that she doesn’t carry her threads more that twenty-five stitches on the back of her work, my eyes bugged outta my head lol!  I was uncomfortable carrying my thread more than THREE stitches!  I’ve actually been freed….whether I complete each stitch individually or stitch multiple stitches in a row of a particular color (cross country stitching), it all works!

Here is Carolyn Mazzeo’s video on her parking technique from her YouTube channel.  Thanks to her excellent tutorials and inspiring works of art, here’s the design I bought and am stitching now.   She’s a mini chart-225 stitches by 337 stitches, called Mini Andromeda.

img_7232-1

Mini Andromeda

I’d loooove to hear what you think.  Would you like to give an all-over crossed stitch design a try?  I’ll keep you apprised of my progress.  Wish me luck!

Hugs and happy stitching,

Dori

Like us on Facebook: Hobbies Up To Here

Subscribe to us on iTunes: Hobbies Up To Here

Check out our YouTube channel: Katie V. with Hobbies Up To Here

Tune in for some Periscope fun: Katie V.

And follow us on BlogLovin: Hobbies Up To Here

Pop by on Instagram: Hobbies Up To Here

Stitch It Up!

It’s been almost thirty years, and I can still hear it now….

The unique sound of dial-up on my new computer and those infamous words…YOU’VE GOT MAIL!

Our first foray into the realm of the Internet was through AOL.  The whole family would gather around, excitedly waiting for our Dell computer to connect….and voila! we were in uncharted, wonderful, scary waters.  Through that simple connection, I found a wealth of information relating to my then obsession, counted cross stitch.

I made a new friend, who guided me to chat rooms and message boards relating to all sorts of needlework.  She introduced me to a whole new level of stitched art, called “band samplers”.  Worked usually on linen over two threads, the band sampler consists of rows or “bands” of intricate stitches that often included beads, cotton, silk or perle cotton thread, and various other textures like braided metallic threads.

p.txt

Photo Courtesy of Joanne Perry of Serendipitous Stitching

Fabulous, yes?

I was also encouraged to buy a reference book called “The Proper Stitch” by Darlene O’Steen.  Ms. O’Steen gives the long and rich history of samplermaking which she documents back to the 1500’s, as well as detailed instructions on each stitch. She concludes with two stunning sampler charts, The Proper Stitch Sampler and Our English Heritage Sampler. I have yet to choose which one I’m going to stitch….I need to practice the various stitches first!

img_7207

Thanks to my friend Lori a.k.a. mrskvlca on Instagram, I now have a HUGE stash of linen, Lugana and Aida fabric, silk and cotton threads, and beads to choose from. Having a standing frame to work on also lends to the creative and authentic setting.

img_7243

And finally, for your viewing pleasure, a video from YouTube that gives you an idea of what a band sampler is. This one is unique….the bands are normally stitched in horizontal rows. The rows on this video, are diagonal! Thus, this sampler is called a Twisted Band Sampler.    

Do you have any experience with this type of stitching?  I’d love to know!

Enjoy!

Dori

Like us on Facebook: Hobbies Up To Here

Subscribe to us on iTunes: Hobbies Up To Here

Check out our YouTube channel: Katie V. with Hobbies Up To Here

Tune in for some Periscope fun: Katie V.

And follow us on BlogLovin: Hobbies Up To Here

Pop by on Instagram: Hobbies Up To Here

TGIFF: The Curved Log Cabin

To be honest, I’ve never been a fan of yellow.  It just doesn’t appeal to me, or hadn’t appealed to me until I made this beautiful Curved Log Cabin quilt for my daughter Jennifer.

I got the pattern from a Missouri Star Quilt Company tutorial.  Trust me, I’ll be making this quilt top again and again!  It was fun and easy.  I have a few jelly rolls that are just begging to be made into another Curved Log Cabin configuration.

I chose a 2 1/2″ jelly roll of Summer Breeze lll fabrics by Moda.  The blues and yellows in various florals, made for wonderful contrasts that helped to define the curve in the log cabin blocks.  The key, however, is the use of a white jelly roll in 1 1/2″ strips.

IMG_6488

Aren’t they fabulous?

I love the variations of yellows and blues!

Using one of the Summer Breeze strips as a center for the Log Cabin block instead of the traditional red or green, caused me to come up a bit short of fabric choices.  I ended up buying a second jelly roll.  No worries!  I used strips from the second roll to bind the quilt.  It worked out well!  Putting the blocks up on my design wall, I was tickled to find there were still many different designs that kept the curved look.

I decided to add two borders.  First I used some of the white 1 1/2″ strips I had left, then I purchased more of the Summer Breeze lll fabric in the darkest blue shade to offset the yellow.  I also used this blue fabric for the backing.

Time to quilt!  I used a new basting technique, a basting gun, which I reviewed here.  Not my fav way to baste, but I’m glad I tried it!

Turning to Christa Watson’s book Machine Quilting With Style, I found the quilting diagram on page 26 of her Ripples quilt to be perfect for this quilt.  I used a serpentine stitch already programmed into my machine, and set to quilting with white Isacord thread.  I love the ease and sheen of this polyester thread, and almost exclusively quilt with it.

IMG_6704
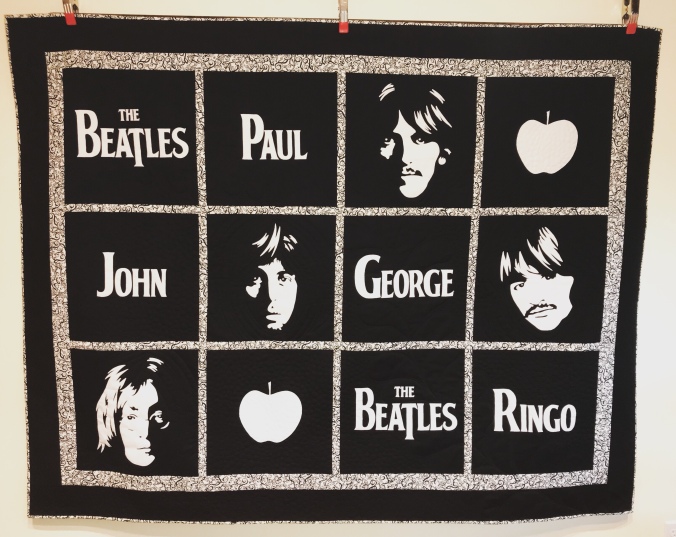
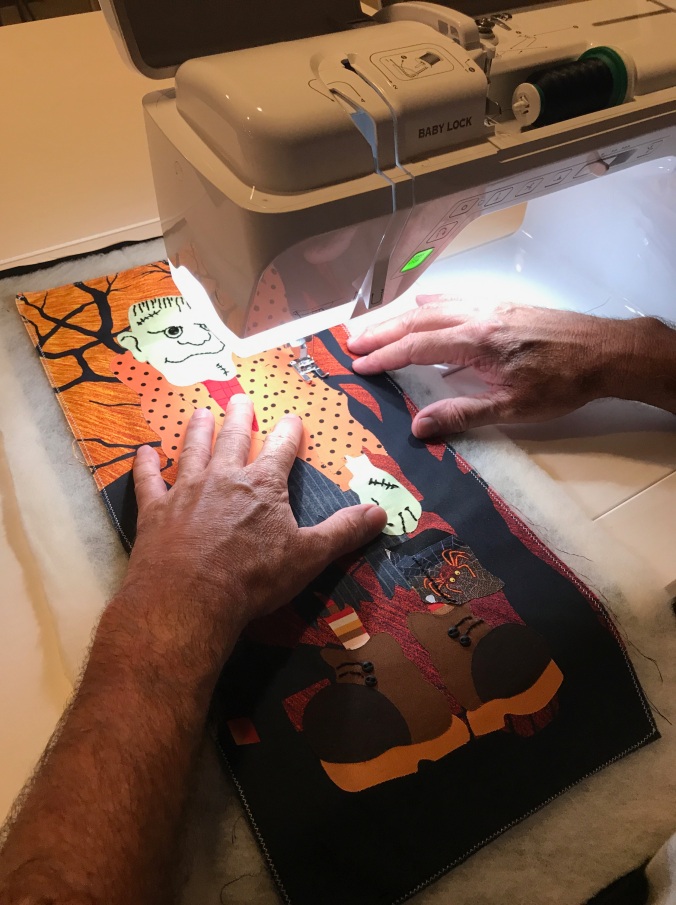
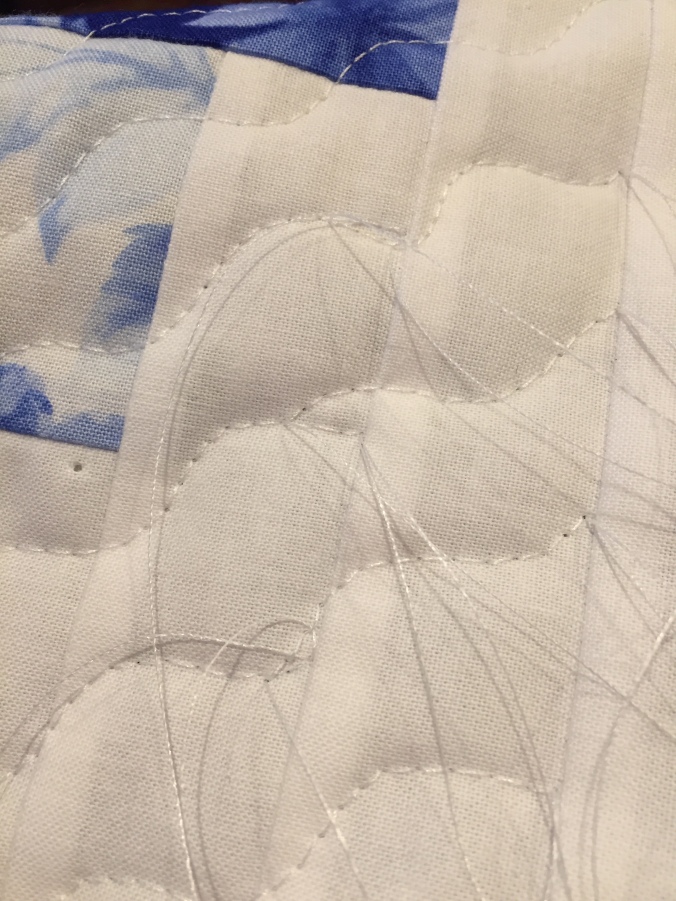
Lots of threads to bury lol!  As you can see, I had a few “booboos”.  I patiently “unsewed” the over lapping threads, knotted and buried them.  And that hole you see?  That was made by my basting gun.  It closed up nicely, however, when the quilt was washed.  Whew!

A nice compliment to the squareness of the blocks!

Annnnn voila!  I used various strips from the Summer Breeze lll jelly roll to bind the quilt.

And yes, that’s the doily my hubby recently crocheted!

Thanks to suggestions from the Twilters group on Facebook, I decided to continue the same serpentine quilting pattern around the border.

I like sewing the binding to the front of the quilt, then hand sewing it to the back.  Adding a personalized label is the final TA DA!!! before putting it in the wash.

Here’s a pretty good look at the design.  Looove it!

Happy Friday everyone!
Dori

Check out our side bar for some great quilting link ups! This post will be linked over at Crazy Mom Quilts.


Like us on Facebook: Hobbies Up To Here

Subscribe to us on iTunes: Hobbies Up To Here

Check out our YouTube channel: Katie V. with Hobbies Up To Here

Tune in for some Periscope fun: Katie V.

And follow us on BlogLovin: Hobbies Up To Here

Pop by on Instagram: Hobbies Up To Here

Carol’s Zoo “Ewok” Bear

Hahaha!  This teddy bear pattern from Carol Cruise of Carol’s Zoo is actually called “Carol’s Bearrit”.  The luxury fur I chose, however, made it look like a cuddly “Ewok”instead!


I glued the two pattern pieces to a sturdy piece of lightweight cardboard, then cut the pieces out. I knew I would want to make more than one bear, and I did this to extend the life of the pattern. (Quilting template plastic can be used too.) Working from the back of the fur, I traced around the pattern with a sharpie, transferring all of the markings. I also chose to use a hole punch for the circle markings, so I could just color them in on the back of the fabric.


When working with fur, this next step is important. Using sharp embroidery scissors, I made sure to cut the backing and not the fur by sliding the scissor points in, skimming the backing, and then cutting on the outside of the marked line.  After cutting, I gently pulled apart the pieces, keeping the fur intact.

When I pinned the pieces together, I used long quilting pins, about 1/4″ apart, tucking in the fur as I went. I used a 90/14 needle, and a longer 3.0 stitch when sewing the 1/4″ seams.  I kept an aluminum knitting needle beside me to help keep errant fur tucked into the seam while I sewed.  After turning the bear right side out, I stuffed it with high quality plush fiber fill, then hand sewed the back opening with a strong ladder stitch.

Voila!


Because my hubby helped me get the quilting done so quickly on the Whale Baby Quilt, I was able to get this adorable bear done in time to give it as an added gift to my Daughter-In-Law at her shower.  Yay for team Nona and Papa!

Have a fabulous weekend my friends!

Hugs,
DoriSignature

Like us on Facebook: Hobbies Up To Here

Subscribe to us on iTunes: Hobbies Up To Here

Check out our YouTube channel: Katie V. with Hobbies Up To Here

Tune in for some Periscope fun: Katie V.

And follow us on BlogLovin: Hobbies Up To Here

Pop by on Instagram: Hobbies Up To Here

Finished or Not Friday at Busy Hands Quilts

TGIFF: A Whale of a Good Time Quilt

There’s nothing like presenting a gift that has love in every stitch.  Such was the case when I gave this adorable “Andrew” whale quilt to my Daughter-In-Law Jaqueline on the day of her baby shower.  She chose the pattern from the book Fat Quarter Baby, and asked that I choose colors that reflected their “under the sea” theme.  She wanted to be surprised, so I picked out the fabrics in secret.  I found the fat quarters at a booth called Custom Creations at Road to California, and I was off an running!


The pattern was fairly simple.  I had a heck of a time however…not the pattern’s fault, but my own brain translating the instructions.  But I never gave up, and with the help of my husband, was able to correct any boo-boos and finish the quilt in under three weeks.

I didn’t realize that I had chosen two fabrics that had directional designs.  This made piecing a bit more difficult, but certainly not impossible.  Here’s the in-progress quilt top.  My hubby placed all the bubbles for me before I appliquéd them down!

We experimented with this built in wave pattern on my Baby Lock Aria machine. What a gift! It worked perfectly!

And then a miracle happened!  For the first time, my husband asked if he could stitch one of the borders…of course I said YES!

The sandwich ready to be quilted!

Then a second miracle happened….da hubs offered to do ALL of the quilting. WOW! I happily gave up my chair after he mapped out and marked the whole design.

It took him about 2 1/2 hours to complete the quilting. Can you tell he’s really happy with the result? Trust me, I’m so impressed and it’s gorgeous!  Oh, and I had him pose in front of “Revolution”, the quilt he designed.  It’s still a work in progress.

I chose to machine stitch the binding to the front, then hand stitch it to the back. I really enjoy hand stitching with a good movie and hubby for company!  But first, I wanted to watch a tutorial on binding, a refresher course if you will.  I love this video by Kimberly of Fat Quarter Shop.  It really helped me to feel confident and well informed!

Finally, the day of the shower arrived. It was so nice to get such wonderful compliments on the quilt, and even nicer still, to say that BOTH Nona AND Papa worked on this project together.  Talk about stitching with love!!! I also made the adorable teddy bear you see in the crib. Here’s the link to THAT post lol!

I attached a label with the instruction that the quilt not be washed yet. After baby comes (he/she is due in late April) I’ll add baby’s name and birth date to the label, then we can soften it up with a gentle run through the washing machine.

Have a wonderful weekend, and thank you for your support and love!
Hugs,

DoriSignature

Check out our side bar for some great link ups. This post will be added to the list of other great finished over at Crazy Mom Quilts!

Like us on Facebook: Hobbies Up To Here

Subscribe to us on iTunes: Hobbies Up To Here

Check out our YouTube channel: Katie V. with Hobbies Up To Here

Tune in for some Periscope fun: Katie V.

And follow us on BlogLovin: Hobbies Up To Here

Pop by on Instagram: Hobbies Up To Here

I Bought Myself A Gun…;)

This one isn’t for self protection, or to go out and bag my own Christmas turkey.  To be exact, it’s a basting gun!  It came highly recommended by one of the employees at my local Jo-Ann fabric store, and I thought, why not?  I love gadgets, and my hubby was itching to try it out himself.

Soooo he and I had a Jo-Ann date, and bought this Dritz basting gun with 500 tacks and an extra refill pack to be sure we wouldn’t run out.

As soon as we got home, Reg immediately set to work lol!  I spread out my Curved Log Cabin quilt on the floor, and he began basting.

Talk about easy!  I was concerned that squeezing the trigger would hurt my hand…nope!  I was also worried that the needle used to insert the tacks would harm my fabric…nope!  The holes are no bigger than a basting pin.  The next concern was the distance between the head of the tack and the end piece.  Would there be too much loose fabric, allowing the quilt sandwich to shift while quilting?  Nope!  Here’s a photo of the spacing for reference.

I felt basting with this gun went smoothly and quickly.  The next test was actually quilting with the tacks in the quilt.

This proved to be a bit trickier than I wanted.  The only way to remove the tacks, is to snip them apart.  I used an older pair of scissors, and carefully cut when I got close to a tack.  Removing the tack’s two pieces was a bit of a nuisance at times.  Sometimes the bottom piece disappeared.  I lifted my sewing table insert, and yup, the errant ones  slid between a crack in my sewing table.  I didn’t want it ending up in my bobbin case, that’s for sure!  Oh, and like pins, don’t sew over them.  I sewed over one, and I had to cut it apart bit by bit (the needle sewed right through the plastic), or totally unquilt an entire line of quilting.  I was successful at removing the plastic pieces, but what a pain lol!

Not a bad way to baste, but honestly, not necessarily my number one choice.  The cutting part slowed me down more than I’d like, and of course, there’s the fact that refills need to be purchased.  For a smaller project, I think this would be my go-to choice.  Larger ones?  I’m still a fan of spray basting.

Do you have a favorite basting technique?  Please share!

Hugs,

DoriSignature

Like us on Facebook: Hobbies Up To Here

Subscribe to us on iTunes: Hobbies Up To Here

Check out our YouTube channel: Katie V. with Hobbies Up To Here

Tune in for some Periscope fun: Katie V.

And follow us on BlogLovin: Hobbies Up To Here

Pop by on Instagram: Hobbies Up To Here