Play Time

At the beginning of each year, my mom and I choose words to live by. They can be actions or descriptions but the purpose is to guide us throughout the year. My word this year is practice. I’ve learned a lot over the last four years here at Hobbies Up To Here and I realized I don’t take a lot of time to practice what I’ve learned. Instead, I rush into new things to learn new techniques rather than putting effort into improving the skills I already have.

So I wanted to focus on this for 2019. Taking time to practice. Making small things. Focusing on one skill and improving it. Create multiples of a project to get in as much practice as possible.

The year has not given me much time for practice. My son decided to play two sports this past season. I’ve been working harder than ever at school. And when I get free time, I tend to choose to do very little. I’m not going to berate myself for this because, #selfcare, but I did decided to venture into my craft room today to create something. Anything.

I went in with a simple purpose: just sit and finish a small project. No worries about perfection. No stress about gifting it to anyone. Hell, it didn’t even need to be anything. Just sit down and sew.

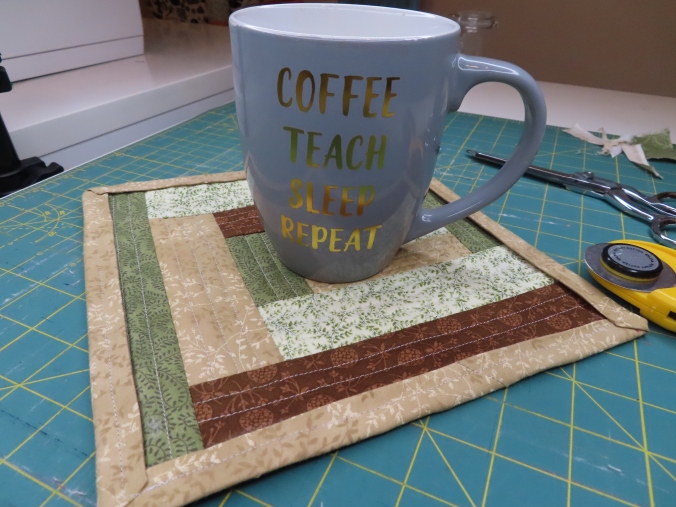
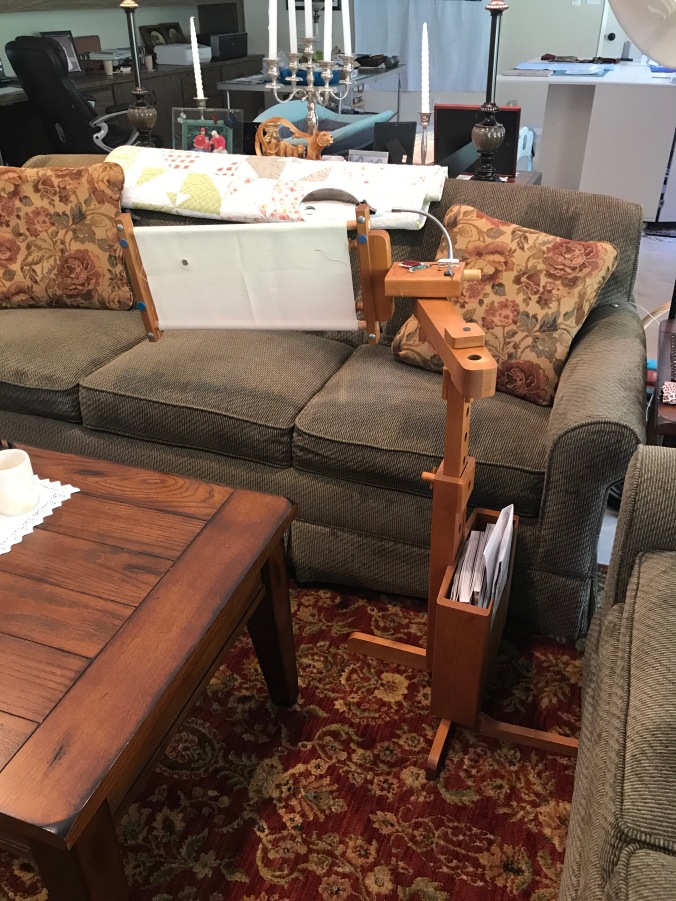
I pulled some scraps and pieced together a simple mug rug with fabric that was already cut. I had no use for this fabric in anything else so I was free to do with them as I pleased.

In a span of 90 minutes, I pieced and quilted. I bound and cleaned up the loose ends. And I was happy with the result. I simplely just allowed myself to play. To practice. To enjoy.

Are there things I would change? Yes. The binding is not my favorite piece. It was too big for such a small project. So I’d change that in the future. Otherwise, I did exactly what I set out to do. I played and practiced and finished a small project.

IMG_2710

Adventures In 3D Sewing: The Paris Purse

There are soooo many wonderful bag and purse patterns available today. While at the Orange Quilt Bee a couple of years ago, I saw one I just had to have, and instantly had someone in mind to gift it to.

My daughter Jennifer’s birthday was coming up, and I didn’t want to give her the normal card with a check as a gift. This Susan Rooney Patterns Versatile Wave Interchangeable Purse by Ruthann Stilwell pattern was perfect!


I also wanted to look for fabric that was reflective of her, and if I could, something that would bring to mind a memory that she and I shared exclusively. She and I spent two weeks in Paris a few years ago, so that’s where my mind went. Now to find a fabric that reflected that!

Luckily, I had no problem in that regard. What I really liked about this pattern, was that it was actually two bags in one; a quilted faux leather clutch alone, or add the reversible outer shell, and it became a shoulder bag.

I did a simple straight line quilting pattern on the faux leather.  Easy peasy!

IMG_5742

I added pockets to the lining of the purse with the faux leather.  I looove that print fabric!

IMG_5741

This is a view of the finished “clutch” part of the purse.  I could have stopped there, but nope! Onto the outer, reversible shell!

IMG_5743

Here’s the finished purse. I love the scalloped edge! The button helps to attach the shell, and adds interest.  The straps are detachable, so the clutch can be used independently.
IMG_5746

This final photograph shows all three views;  the clutch, the reversible shell with the neutral fabric showing, and then that lovely Paris fabric!  And yes, that’s a photo of Jennifer and me when she was itsybitsy!
IMG_5759

This was a fun project to make. It had been a long time since I’d inserted a zipper;  sewing with faux leather was a new experience, as well as adding the hardware;  I’m glad I tackled it. Jennifer was tickled with her custom birthday gift! Yay!

Enjoy your crafty day!

Hugs,
Dori

Jacob’s Super Block

I recently finished the top to Jake’s Marvel Quilt. All 48 blocks are done!

My son is thrilled to have this top down and to be that much closer to having his very own full sized quilt done.

As I shared this WIP, I had a lot of friends and fellow quilters ask me where I got the pattern for this block. Well, I didn’t use a pattern! Instead I pieced the block on my own to get a certain look.

I wanted the block to be framed with opposing colors alternating around the block. I made sure to fussy cut the centers so that each character would be framed nicely by the sashing.

As I continued to share my blocks, I kept getting questions about it’s construction so I decided to sit down, give it a name (Jacob’s Super Block) and lay out the steps to creating one.

To make a Super Block, you’ll need  three fabrics: your center fabric to display, one light fabric and one dark. Your light and dark fabrics can be solid or just fabrics with opposing patterns to contrast against each other.

For your center fabric, cut it to the size you want. For these Super Blocks, the center block is 6.5 inches.

Your sashing strips should be 1.5 inches wide and as along as you want. I folded my fabric and cut from end to end so I had nice long strips to work with.

To make your block, you start with your lighter fabric on the left side of your block and (1) attach to the left side then trim. Then (2) attach the same light fabric to the top of the block then trim. After each sashing, trim the excess off and square up your block.

The next step is to (3) attach the opposing dark fabric to the right side of the block, including the edges now made by the attached light fabric. Trim. Then (4) attach another strip of the dark fabric along the bottom and trim. At this point you’ll have a border framing your center block, one corner will be light and the opposite corner will be dark.

Now to continue, you swap colors. Light will go in the opposite corner and the dark fabric will go in the opposite corner. Attach (5) a light strip of fabric along the dark sashing on the right then trim. Then attach (6) another light strip along the bottom and trim.

To finish, attach (7) a dark strip along the top and trim. Finally, (8) attach the last dark strip along the left side and trim. Square up your block and press.

If you are like me and need a good visual to see how it’s done, check out my video tutorial from my Youtube channel showing how to make this block.

And if you give it a try, share your block on Instagram and tag with with the hashtag #huthsuperblock and #hobbiesuptohere.

We can’t wait to see your version of this fun block!

Like us on Facebook: Hobbies Up To Here

Subscribe to us on iTunes: Hobbies Up To Here

Check out our YouTube channel: Katie V. with Hobbies Up To Here

Check out our Zazzle shop for your Hobbies Up To Here merchandise!

And follow us on BlogLovin: Hobbies Up To Here

Pop by on Instagram: Hobbies Up To Here

Back In The Saddle Episode #80

And we’re back! We’ve missed podcasting and after two months of an unplanned hiatus, we’re sitting and chatting again about our lives and all our crafty projects.

We’ve got projects galore on Dori’s craft table and I’m still battling my way through a few UFOs and WIPs. Check out our Instagram feed for updated pictures of what we’re working on!

Like us on Facebook: Hobbies Up To Here

Subscribe to us on iTunes: Hobbies Up To Here

Check out our YouTube channel: Katie V. with Hobbies Up To Here

Tune in for some Periscope fun: Katie V.

And follow us on BlogLovin: Hobbies Up To Here

Pop by on Instagram: Hobbies Up To Here

Short On The Borders

At the beginning of this year, my mom and I agreed that 2017 should be the year of finishes. We had enough projects going to last us a lifetime and we needed to get some of that work done!

Well I’ve sorta lived up to my word. I did finish my husband’s quilt not too long ago and he now sleeps wrapped up in it on warmed nights.

My son’s quilt still languishes due to having run out of his border colors. I’ll need to finally bite the bullet and just purchase more so I can get that one done, too!

But last summer I started a quilt with this adorable flannel fabric I found at JoAnns. Originally, I got it for a friend’s baby boy but he has since grown beyond such a young pattern. Then I was blessed with two nephews, one whose room is adorably grey and light colored, similar to this fabric. Plus, he’s got an animal theme going so it’s perfect for him.

Well, this project has made it’s way out of my drawers and I’ve finished the top. It’s small and simple, just right for a little guy who needs some extra snuggles on chilly fall nights.

It’s adorable and fuzzy soft. I’m considering some minky for the backing to make it even softer.

But I have a small conundrum. There is a border the lines only two sides of this top. It is the slimmer pieces that surround the larger squares. I’m all out of fabric from this kit (except for some random end pieces) so I have a few paths I can take to even this out.

  1. I could just leave it be with that slim border only on two sides.
  2. Or I could remove both sides and leave the outer edge border free.
  3. Or, and this one is probably the most work, I could trim down the borders and then attach it to the barren sides. But my cutting and measuring would have to be pretty precise if I don’t want to screw it up.

So, quilters, what should I do?? Should I go with plan 1, 2, or 3? Or maybe there is another plan I haven’t considered. I do have to get fabric for Jake’s superhero quilt so I could just see if JoAnns has any more of this kit lying around. This would mean I have 4 options!

Decisions, decisions!!!

Gettin’ It Done All By Himself (almost)!

A few years ago, my son asked if I could teach him to sew and piece a block. Oh he was a cute little thing then and really took to piecing the bright colors from a simple fabric kit I had bought.

Then a long lapse in time away from the craft room happened and about two years ago we got back to piecing his block and completing it.

He was pretty happy with his block but it didn’t keep his attention long enough to come back to it and do any more or anything else to that one block. What can I say,  Pokemon and soccer occupies the majority of his attention!

After along time collecting dust in the closet, he finally asked again to pull out that block and make something of it. He really wanted to quilt it himself especially after having watched a long arm machine run in a shop we had visited. Watching the beast of a machine smoothly lay down stitches in a beautiful swirling pattern was enough to inspire him.

So I sandwiched his block with some random fabric from my stash and some scrap of batting left over from a bigger project. He’s really into purple these days so finding a swatch of purple and black fabric was just what he wanted.

His quilting was simple. Using a walking foot, he echoed the colorful swatches in his block. I guided him here and there but for the most part he did the work all himself. He kept his speed low and simply walked along to quilt his block together.

He helped me trim his block but using the rotary blade has always been tough for him. I’m making a note to myself that he needs a blade that works for both right and left handed people.

I really wanted him to help with every part of the process so he pressed and arranged his binding strips after I sewed them together.

It took a bit of team work but he pinned the binding down and got himself all set up to sew it to his block.

That walking foot sure came in handy. Every time he sat at the machine, it was the only foot he used. I figured with all the fabric and the larger base on the foot to line up against the edge, it would all make it easier for him to get done what he needed.

At this point he informed me he wanted to hand stitch the binding. I was pretty impressed. That’s a big task to undertake! But I happily set him up and gave him some pointers until…

UH OH!

My poor kiddo. When will I ever learn that he’s a lefty!!! I mean I’ve only been his mom for 11 years!! I started him off in the direction a right handed person would sew but once I handed it to him, he realized that wasn’t going to work for him.

He gave it a good try but it just wasn’t turned right and he was more frustrated than anything. Trying to sew the binding upside down just wasn’t going to work. I apologized and promised I would get it right next time and decided to just have him finish it off on the machine.

And here is his very first finished block! Now he did help to make his Darth Vader quilt but I did the quilting and binding. This time, he did most of it himself with only some help from me.

He’s pretty stinking proud of his mish-mash block with flowers on the back and stripes on the front. It took him some time to finally feel the need to do something with it but in the end, he’s happy and I’m so proud.

Stitch It Up!

It’s been almost thirty years, and I can still hear it now….

The unique sound of dial-up on my new computer and those infamous words…YOU’VE GOT MAIL!

Our first foray into the realm of the Internet was through AOL.  The whole family would gather around, excitedly waiting for our Dell computer to connect….and voila! we were in uncharted, wonderful, scary waters.  Through that simple connection, I found a wealth of information relating to my then obsession, counted cross stitch.

I made a new friend, who guided me to chat rooms and message boards relating to all sorts of needlework.  She introduced me to a whole new level of stitched art, called “band samplers”.  Worked usually on linen over two threads, the band sampler consists of rows or “bands” of intricate stitches that often included beads, cotton, silk or perle cotton thread, and various other textures like braided metallic threads.

p.txt

Photo Courtesy of Joanne Perry of Serendipitous Stitching

Fabulous, yes?

I was also encouraged to buy a reference book called “The Proper Stitch” by Darlene O’Steen.  Ms. O’Steen gives the long and rich history of samplermaking which she documents back to the 1500’s, as well as detailed instructions on each stitch. She concludes with two stunning sampler charts, The Proper Stitch Sampler and Our English Heritage Sampler. I have yet to choose which one I’m going to stitch….I need to practice the various stitches first!

img_7207

Thanks to my friend Lori a.k.a. mrskvlca on Instagram, I now have a HUGE stash of linen, Lugana and Aida fabric, silk and cotton threads, and beads to choose from. Having a standing frame to work on also lends to the creative and authentic setting.

img_7243

And finally, for your viewing pleasure, a video from YouTube that gives you an idea of what a band sampler is. This one is unique….the bands are normally stitched in horizontal rows. The rows on this video, are diagonal! Thus, this sampler is called a Twisted Band Sampler.    

Do you have any experience with this type of stitching?  I’d love to know!

Enjoy!

Dori

Like us on Facebook: Hobbies Up To Here

Subscribe to us on iTunes: Hobbies Up To Here

Check out our YouTube channel: Katie V. with Hobbies Up To Here

Tune in for some Periscope fun: Katie V.

And follow us on BlogLovin: Hobbies Up To Here

Pop by on Instagram: Hobbies Up To Here

Guilded Episode #68

It’s official, Dori has joined a guild!
In this episode we update you on our health, our finished projects, and our time at the Orange County Quilters Guild quilt show!

Dori recent gave a beauty a hack a try. After watching this video, she attempted an “eye lift” technique that ended up best saved for the pros.

And it turns out that my chicken tender Pinterest recipe was a pass except that I accidentally used pancake mix instead of flour to dredge the chicken in before coating. HAHAHA! Only I would make a goof like that!

We both had some very big finishes this week!

Dori finished my sister Jennifer’s quilt, the curved log cabin quilt!

I finished my splendid sampler table topper!

I did my binding using this video from Youtube. It’s a great demonstration of how to bind using your backing fabric.

We got to go to the Orange County Quilters Guild annual quilt show.
We saw fabulous quilts and met with wonderful vendors like:

There was a lot to see and do, so definitely check out our Instagram page (link below) to see some of the quilts and goodies from the show!

Like us on Facebook: Hobbies Up To Here

Subscribe to us on iTunes: Hobbies Up To Here

Check out our YouTube channel: Katie V. with Hobbies Up To Here

Tune in for some Periscope fun: Katie V.

And follow us on BlogLovin: Hobbies Up To Here

Pop by on Instagram: Hobbies Up To Here

Shenanigans and Tantrums Episode #67

Happy Easter hobbyists and crafters!
We sat down and chatted about our current projects and frustrations a day early so we can enjoy a day hunting for eggs and visit with family!

img_6544

We both struggled with some of our projects this week. But we got through it and made some great project.

Dori used this video below to help her figure out her binding tool.

She’s also been enjoy Angela Walters’ Midnight Quilt Show. Definitely check it out!

I stuck to my goal and made five days worth of videos (plus a bonus video)on our YouTube channel. We attempted 5 different Pinterest pins and shared our process and our end results.

I’ve also started using my Splendid Sampler blocks in different quilted projects. I’ve started a table topper and attempted some pebbling.

Dori is almost finished with her most current quilt, the curved log cabin.

Dori’s going to be receiving the Hello There! Aida Cross Stitch box from The Fat Quarter Shop. Check back to see what she thinks about receiving cross stitch goodies in the mail.

Like us on Facebook: Hobbies Up To Here

Subscribe to us on iTunes: Hobbies Up To Here

Check out our YouTube channel: Katie V. with Hobbies Up To Here

Tune in for some Periscope fun: Katie V.

And follow us on BlogLovin: Hobbies Up To Here

Pop by on Instagram: Hobbies Up To Here

WIP: Splendid Sampler Project #1

So I’ve got these blocks just lying around. They are pretty and I loved making them but I had no idea what to do with them.

Oh yeah…

That’s because they were apart of a larger project that I never completed! A little something called The Splendid Sampler.

It’s been awhile since I’ve played with these blocks but it’s time for me to do something with them. So I decided to pulled a few out and put them together into something I can use around the house. Plus it would give me the ability to practice my free motion quilting on smaller projects.

My first project (yet unnamed) is going to be a table topper/runner. I pulled three pieced blocks and sashed them with black and then bordered the whole thing in a complementary cream fabric from the same line.

The top turned out super cute. I stuck with only pieced blocks so that they seemed uniform and not too busy.

Then I decided to try my hand at a little pebbling. I did some practice runs before hand to get my tension and pacing down. Then I took to the borders with a black Aurifil thread so that if I did make a mess, it would be hard to see.

Probably the best idea as my pebbling definitely needs work. 

As I battled with my quilting and trying to make decent little circles, I realized that my batting was making a complete mess. Fuzz everywhere… And a few of my seams decided to pull and strain, which annoyed me but not enough to pull it out and start over.

Had I used any other lighter color for the backing, the fuzz probably would bug me so much. But up against that black, all I an see is the nasty white fur all over.

During some of my time off, I’m planning to get back to pebbling and practicing. I’m also recording my process for our YouTube channel so stay tuned for any updates!

Check out our side bar for other quilting blogs and link ups for WIP Wednesday.

Like us on Facebook: Hobbies Up To Here

Subscribe to us on iTunes: Hobbies Up To Here

Check out our YouTube channel: Katie V. with Hobbies Up To Here

Tune in for some Periscope fun: Katie V.

And follow us on BlogLovin: Hobbies Up To Here

Pop by on Instagram: Hobbies Up To Here